


Most issues you face with drywall and plaster stem from cracks, water damage, and settling; mold and structural weakness pose the greatest danger, while drywall's easier DIY repairs offer a faster, cost-effective solution you can evaluate before calling a pro.
Key Takeaways
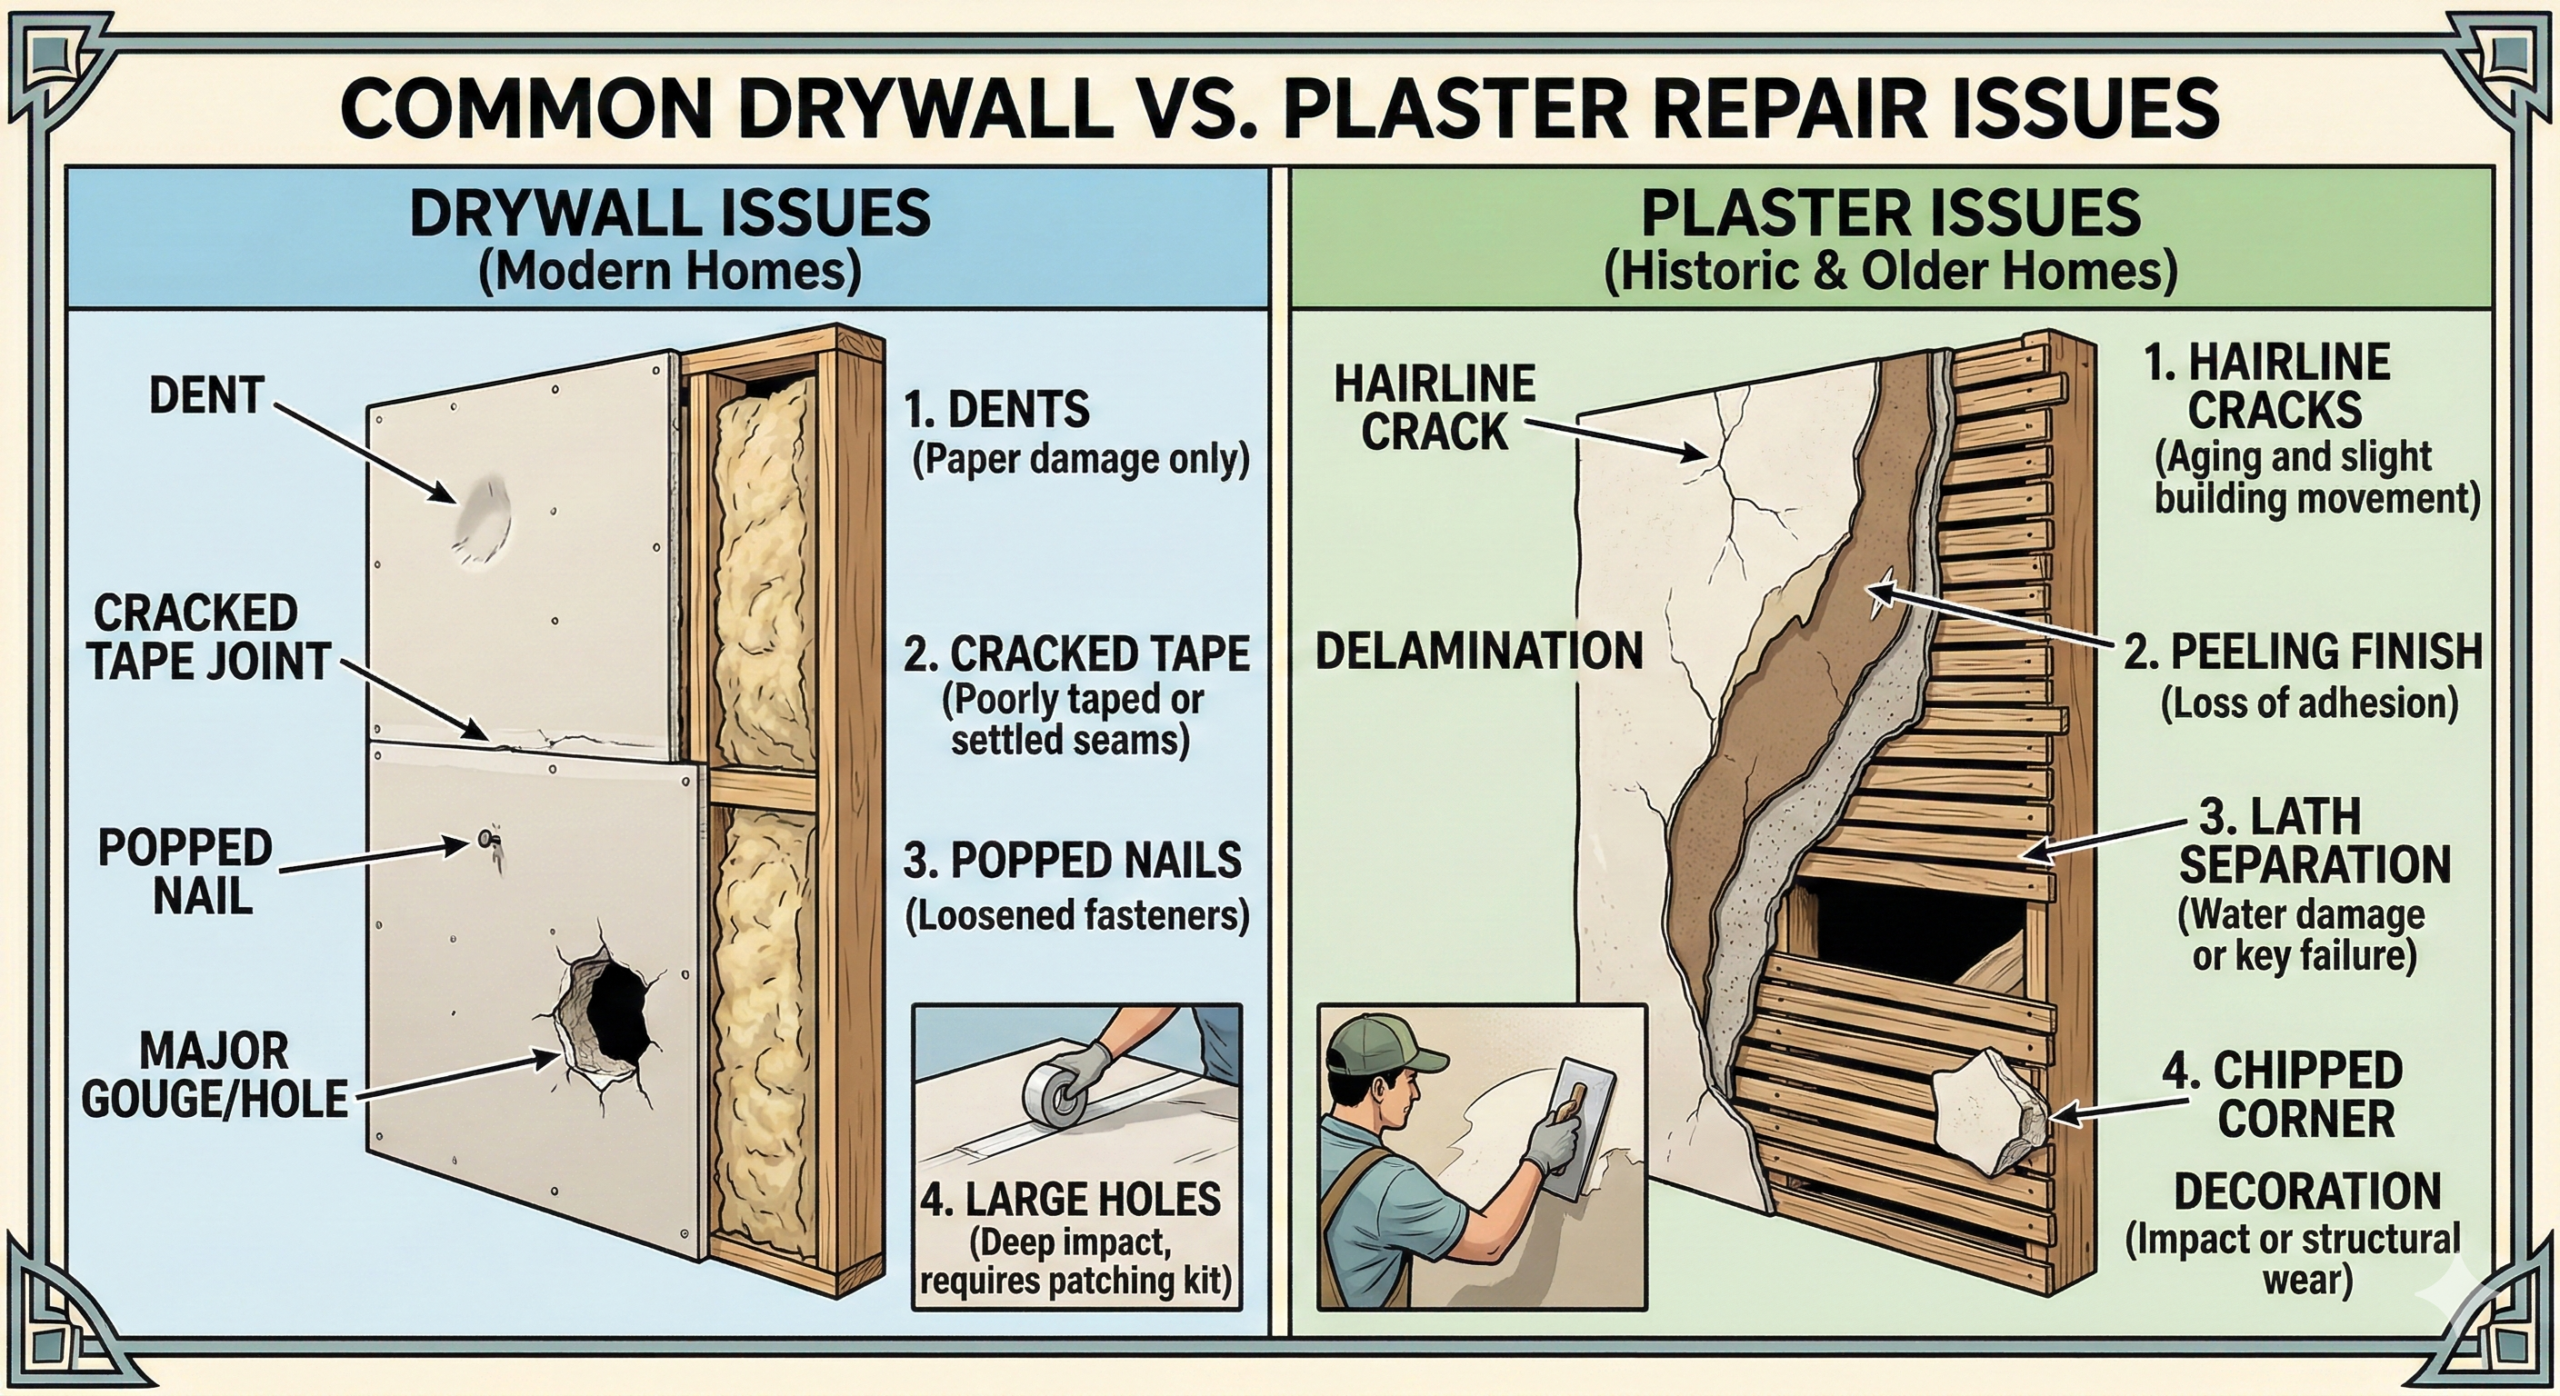
Drywall repairs are generally quicker and less expensive than plaster because damaged panels can be cut out and replaced, then taped and finished.
Plaster repairs demand skill and time: matching original multi-coat applications, lath repairs, and drying times make restorations more labor-intensive.
Cracks in plaster frequently indicate movement or lath separation, while drywall cracks often stem from fastener issues or improper taping.
Moisture damages both materials but affects plaster differently; saturated lath and base coats may require full-area restoration, while drywall often needs section replacement and mold remediation.
Correct diagnosis of substrate, framing, and finish type guides the appropriate repair method and accurate cost estimates.
Foundational Differences in Material Composition
Materials used in walls change how you approach repairs: drywall is a factory-made gypsum panel, while plaster mixes use lime or cement with sand. You will find that each material reacts differently to moisture and impact, so diagnostics and patch techniques diverge sharply.
Gypsum Board vs. Traditional Lime and Sand Plaster
Gypsum panels let you complete fast, predictable patches, whereas plaster demands skill to recreate thickness, texture, and key coats so you avoid visible seams. You must expect plaster to hide hairline cracking and underlying lath issues, and treat moisture-damaged areas more conservatively.
Structural Rigidity and Weight Distribution Factors
Load considerations shift your repair priorities because plaster adds significant weight and rigidity compared with lightweight drywall, which can flex and transmit different stresses to fasteners and framing. You should inspect backing and framing for sag or separation. This dictates whether you reinforce studs or replace panels before cosmetic work.
Consider how fastening patterns and substrate condition change long-term performance: plaster often bonds directly to lath and can mask rot or loose nails, while drywall relies on screws and tape joints that fail under differential movement. You will need different repair materials and sequences for each system. This influences your choice of anchors, adhesive and finishing method.
Prevalent Drywall Damage and Repair Hurdles
Many common repairs hide underlying causes you must spot early, from moisture intrusion and poor framing to structural movement that repeatedly reopens seams and undermines finishes.
Joint Tape Delamination and Stress Cracking
If tape delaminates you will see linear cracks along seams and should remove failed tape before re-taping to avoid recurrent cracking that wastes time and materials.
Tape selection and mud build-up affect longevity, so you should apply the correct tape with properly feathered coats to reduce stress concentrations and visible hairline cracks.
Addressing Nail and Screw Pops in Modern Framing
When nail or screw pops appear in modern framing you need to assess framing shrinkage or fastener withdrawal and countersink, re-anchor, or replace fasteners to prevent repeat failures.
You can use longer screws, adhesive-backed washers, or targeted blocking to secure panels, but avoid cosmetic fixes alone since they can hide hidden damage.
Chronic Plaster Deterioration Patterns
Older plaster systems often show layered failures where hairline cracks spread into larger separations; you can track these back to repeated movement or moisture intrusion. Inspect areas above fixtures and along exterior walls to spot early delamination before it becomes a larger problem.
Prolonged exposure to humidity and roof leaks will accelerate plaster breakdown, causing hidden rot in framing that you might miss during a casual walk-through. Addressing leaks early reduces the chance of structural compromise and costly full-area replacements.
Failure of Lath Keys and Plaster Separation
Repeated nail pull-out and decayed wood lath let plaster lose its mechanical key, and you’ll notice bulging and panels that detach under light pressure. Treat any area with loose plaster as a falling-debris hazard until repaired.
Tension from framing movement or moisture swelling can pry keys free, so you should verify substrate integrity before patching. Use mechanical anchors or replace damaged lath when simple reattachment won’t restore secure bonding.
Map Cracking and Structural Sagging in Ceilings
Wide, branching "map" cracks in ceilings signal shear stresses that you should not ignore, since they often precede sagging or partial collapse. Check for localized deflection above the cracking to assess immediate risk.
Ceiling sag typically means joist deflection or lost plaster support, and you'll need temporary shoring if deflection is pronounced. Prioritize areas with both cracking and sag for fast action to avoid a collapse risk.
Inspection of attic spaces and rooflines will help you trace moisture paths feeding map cracking, and you should engage a structural engineer when widespread sag or large sections separate. Implement immediate shoring where necessary and plan for joist repair or full replastering based on their assessment.
Specialized Patching and Finishing Techniques
Selecting Between Setting-Type and Evaporative Compounds
You should pick setting-type for repairs that need fast strength gains and minimal shrinkage; these cure chemically, have a short working time, and can feel warm, so mix small batches. Evaporative compounds dry by water loss, give you a longer working time and are easier to sand, but require multiple coats and good ventilation to lower inhalation risk.
Mastering Seamless Texture and Skim Coat Blending
Set your base coats flush and feather edges so the skim coat can blend without ridges; match the original tool pattern and pressure to mimic texture. Use a thin skim over the repair and sand lightly between passes to avoid overworking the surface and creating visible lines.
Mix skim material to a lump-free consistency and try a small sample on scrap to confirm texture and sheen; you can thin slightly for flow but avoid over-thinning which weakens adhesion. Keep a mask on because sanding releases fine dust that increases inhalation risk.
When matching texture on larger areas, work in overlapping sections and check your progress under angled light so you catch mismatches early; multiple thin passes produce the best blend and reduce the chance of sanding through to the patch base.
Environmental Impact on Wall Longevity
Climate swings accelerate wear on joints, finishes and fasteners; you should schedule inspections after seasonal extremes. Surface coatings hide damage until it worsens; addressing moisture intrusion and thermal stress early prevents accelerated joint failure and shortened finish life.
Moisture Absorption and Mold Proliferation Risks
Humidity that reaches gypsum or plaster softens cores and degrades paper facings, producing stains, sagging and mold. Unchecked mold proliferation threatens health and forces extensive replacement; prioritize ventilation, drying and prompt patching of wet areas.
Thermal Expansion and Seasonal Movement Challenges
Fluctuations in temperature cause repeated expansion and contraction of framing and panels, so you notice hairline cracks along seams and nail pops. Repeated movement stresses finishes and creates seam separation that opens pathways for moisture and larger failures.
Preventive steps you can take include installing flexible compounds, adding trim backer support, and allowing expansion gaps at long runs; routine seasonal inspections catch offsets early. Using flexible sealants and targeted flash repairs reduces long-term repair cycles and cost.
Final Words
So you must weigh material differences, repair difficulty, and long-term performance when addressing common drywall versus plaster issues. You will find drywall repairs are quicker and cheaper but prone to visible seams and nail pops, while plaster demands skilled patching and texture matching; factor in moisture damage, underlying lath condition, and time when deciding which approach suits your project.
Need Expert Help with Your Wall Repairs?
Whether you're dealing with stubborn plaster or damaged drywall, GoHandyFix has the skilled professionals to handle your repair needs with precision. Contact us today for a free consultation and let us restore your walls.
Related Services
Get Your Free Quote
Ready to start your wall repair project? Let our experts help you restore your walls perfectly.